In this article, you’ll learn how to customize online payment and intake forms to set and collect the information you want your clients fill out when they pay online.
Online payment form
Once a client clicks on Make a Payment, they will be asked to fill out a payment form, like the one shown here: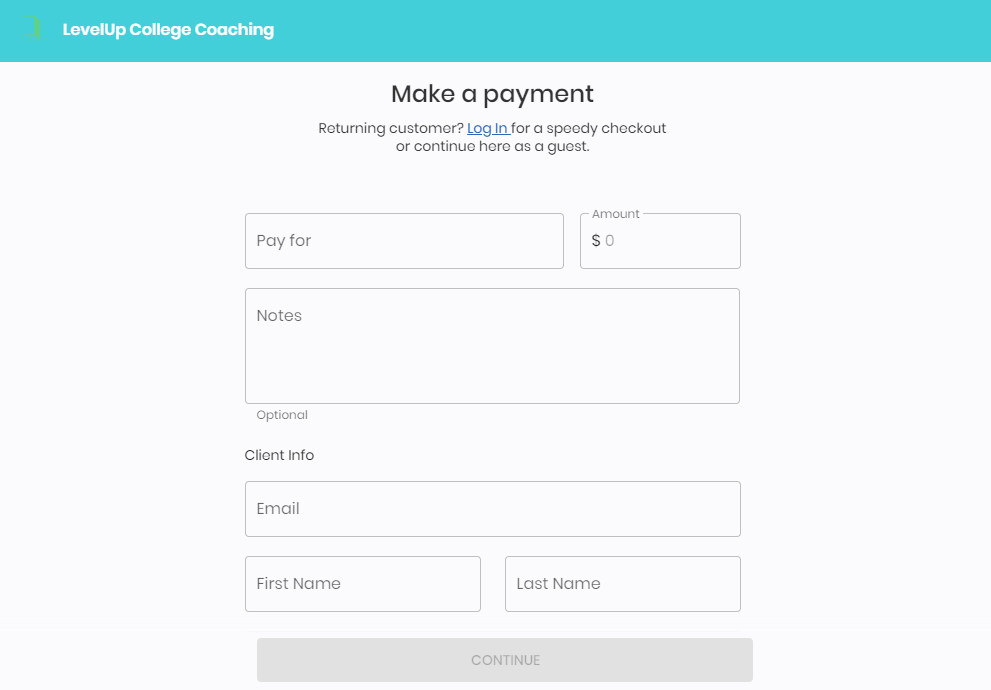
Here’s how to generate a payment link:
Step 1: Go to Online Presence > Client Portal > Create Direct Links
Step 2: Select the Pay action, as shown here:
Step 3: In the above popup screen, you have two options:
- Fill out an exact service, item & amount.
-
Leave blank for your clients to fill out when they submit their payment.
Once you’ve sent the link, here’s the payment form your client will see. In this example, the business has chosen to specify an item and amount:

Payment intake form
If you want to customize the intake form your clients will see when they submit a payment, follow these steps:
Step 1: Go to Settings > Client Card
Step 2: Navigate to Intake Forms and select the Payment Form. See below: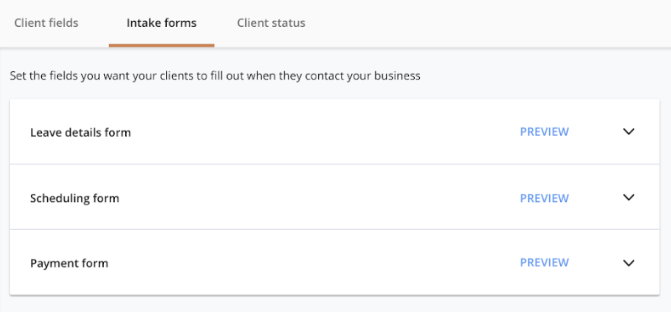
Step 3: Add, edit, remove or reorder the Client Fields on the form to get the information you need.
- Payment Policy: Use this field if you want to include any information that you want clients to read before submitting their payment (for example, payment terms & conditions).
Payment experience: client-side
1. If your client is paying through a direct payment link, they will be asked to fill out the online payment form.
2. If your client is paying from an electronic invoice sent by email, or from their Client Portal personal account (under Payments), they will be directed to pay for an exact service / item and amount they have pending.
In both cases, your clients will be directed to choose their payment method, based on the payment processing options you’ve selected.
Payment experience: business-side
1. Payment notifications:
When a client completes a payment, you will be notified based on your notification settings.
To view or change your payment notification settings simply go to Settings > Staff. Then, select yourself or a staff member, and navigate to Notifications.
From there, you can choose to receive an email only, or to be notified via both email and text message.
2. Tracking payments:
You can view all your incoming payments at once under Payments > Payments Received. Filter by Payment Source - Paid Online to view only the payments which were submitted online.