In this article, you’ll learn how to add and define your services for your future scheduling needs.
Once you add and define a specific service, it becomes available to you anytime you want to schedule a new appointment or group event by directly drawing from your service menu.
There are two types of services:
1-on-1 appointment: A meeting between you and one client.
Group Event: An event led by you with multiple clients, such as a class, a workshop, or webinar.
Adding a 1-on-1 appointment
Step 1: To add a new 1-on-1 appointment go to Settings > My Services.
Click New Service at the top and select 1 on 1 appointment.
Step 2: Fill out the appointment details and required fields such as Service Name, Location, and Price for this service.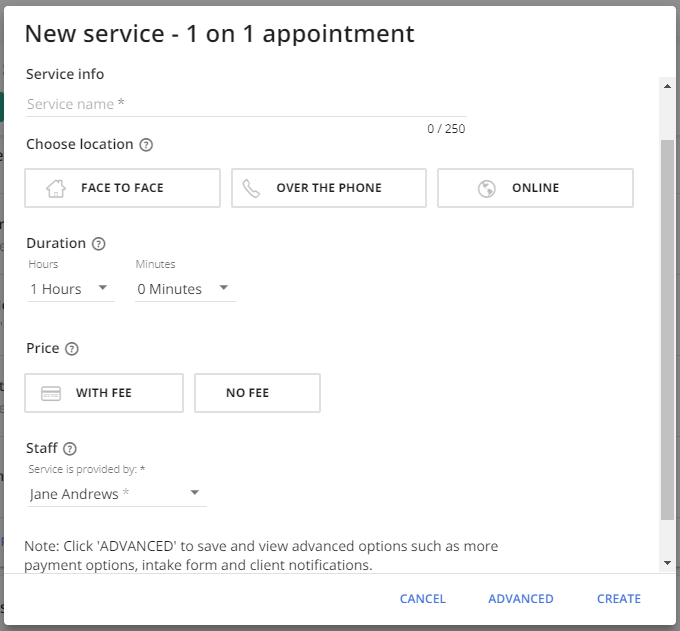
- Locations can be either Face To Face, Over The Phone, or Online.
You can set the Face To Face & Over the Phone service locations in advance, or allow clients to submit the locations themselves upon scheduling. - Staff selection defaults to Primary Admin.
If you have more than one staff member, multiple staff can be assigned to a service
Step 3: Once all the fields have been filled out click Create to add your new service, or Advanced to create the service and open the Edit page to access additional settings for the service.
Adding a group event
Step 1: Go to Settings > My Services, click on New Service, and select Group Event and fill out the group event details and required fields.
Step 2: Filling out your group event details is the same as completing your 1-on-1 appointment details (above) with the exception of the Max attendees field.
Max attendees: Enter the maximum amount of clients that can register for the event online. After this number is reached, your event will be closed for registration, for your convenience.
Step 3: Once all the fields have been filled out click Create to generate your new service, or Advanced to create the service and open the Edit page to access additional settings for the service.
Defining your service (advanced settings)
When creating a service, click Advanced to access further 1-1 appointment or group event details.
These are the details and settings you can customize for a service:
- Service Info: Includes service name, description, an image (with an image bank to select from), category, and whether the service displays on the Service Menu.
- Location: Your appointment or event can be Face to Face, Over the Phone or Online, with a dedicated location field for each option.
- Duration & Availability: You can add prep time to the service duration, customize service availability, edit date specific availability for the service, and set the booking intervals.
Note: Booking intervals controls the availability shown for this service. The default Booking Intervals adds your service duration and prep time.
However, you can customize this feature so that the appointments display in round numbers: on the hour, half hour, and so on.
- Price: Select how the fee displays to clients, and whether payment is required at booking.
- Staff: Set the assigned staff member(s) and how the selection of staff members happens at booking if more than one staff member is assigned.
- Client Intake Form: Create a form for clients to fill out during booking. Every time a client books the service, they will be asked to fill out the form.
Once you complete all your edits, save your changes by clicking the Done button at the top of the page.
You can go back and edit any of your services anytime from Settings > My Services. Just click on the service you want to edit.